Photoshop CS6 has updated its 3D tool adding more features and making it easier
to use and faster. We decided to play with some 3D using Photoshop to
create a basic extrusion and then adding some old halftone style to it.
So in this tutorial we will create a basic 3D effect using
Photoshop
and
Illustrator. The whole process is very simple but it might take you
up to 2 hours to go through the whole technique.
Step 1
Open
Illustrator and create a new document. Using the font
Teutonic No1 DemiBold, you can download it here (
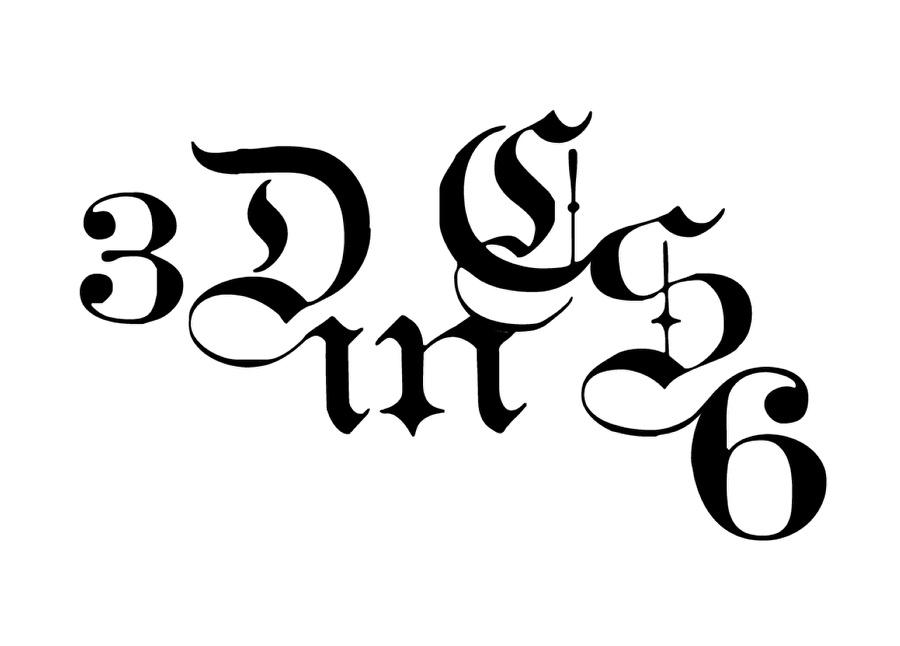
http://www.fontsquirrel.com/fonts/Teutonic-No1), create your text. I added the text 3D in
CS6. Notice that I connect the letters so there pretty much one big block.
Step 2
Copy the text in
Illustrator and then go to
Photoshop. Paste the text there.
Step 3
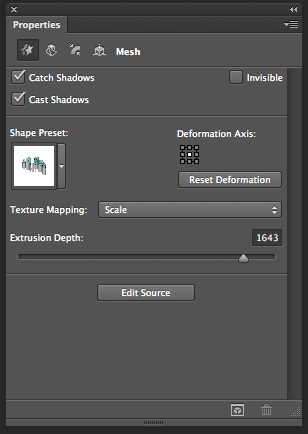
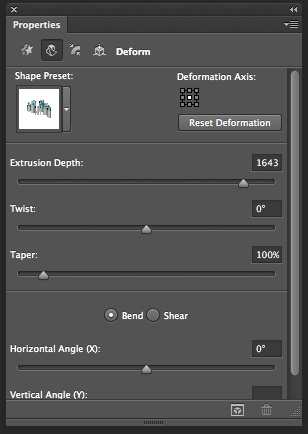
Time to add some 3D. With the new layer selected go to
3D>New 3D Extrusion from the
Selected Layer. After go to
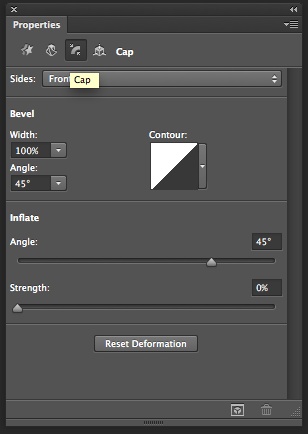
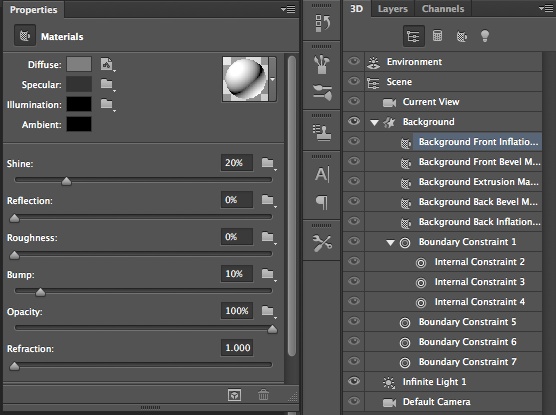
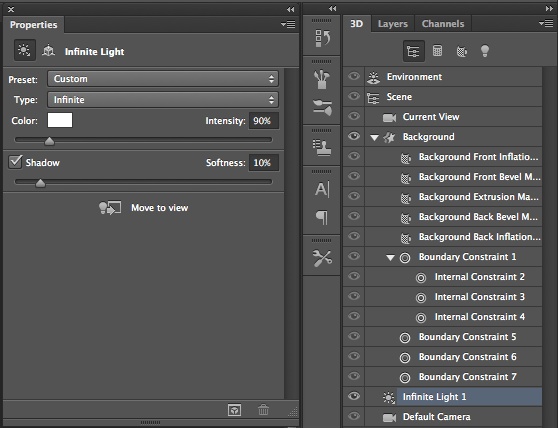
Window>3D so you can see the 3D panel. Follow the images below for the 3D properties for the Scene, Object, Texture and Lighting.
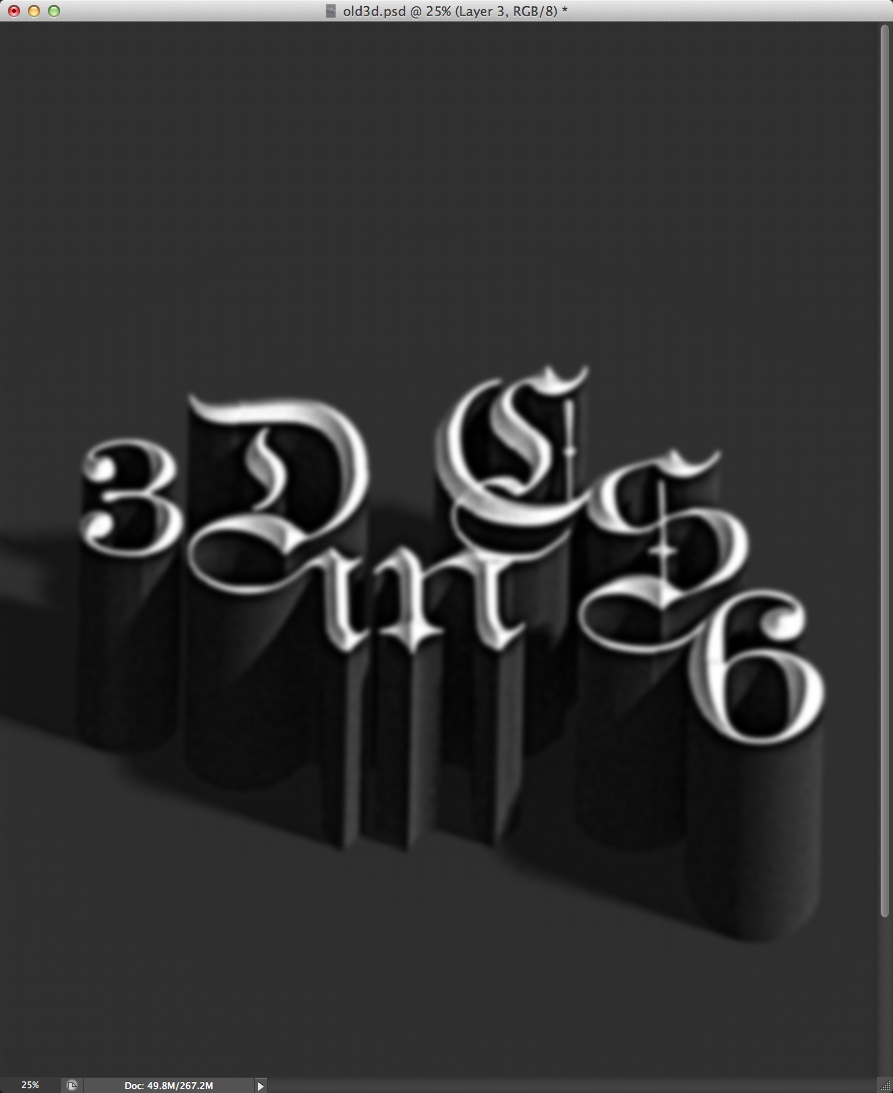
Step 4
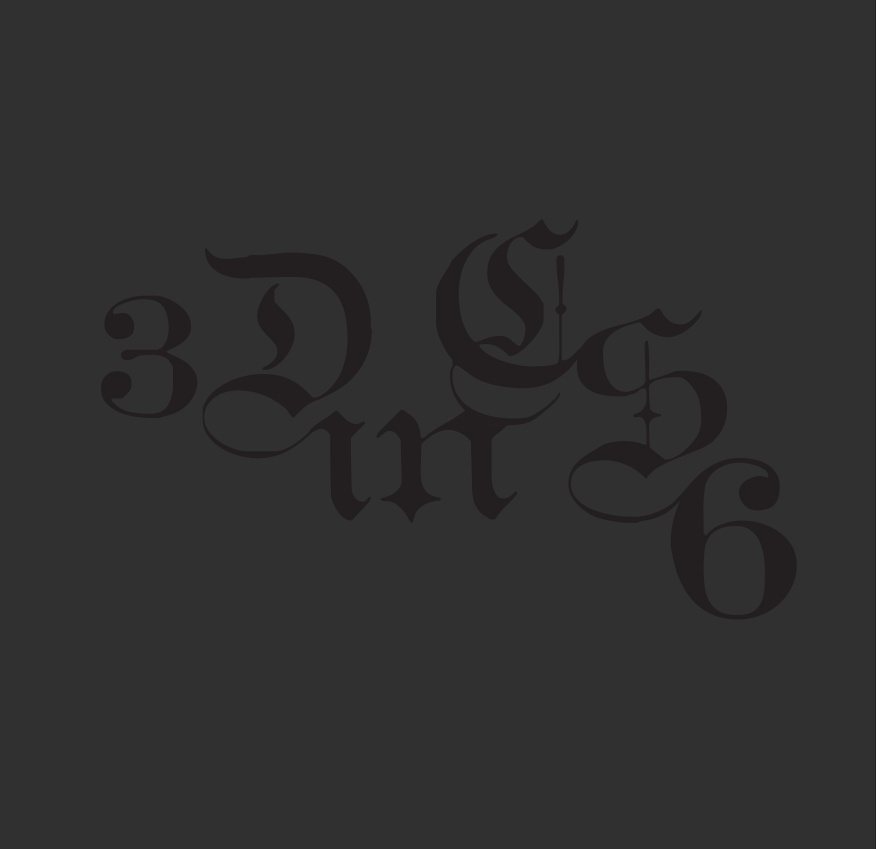
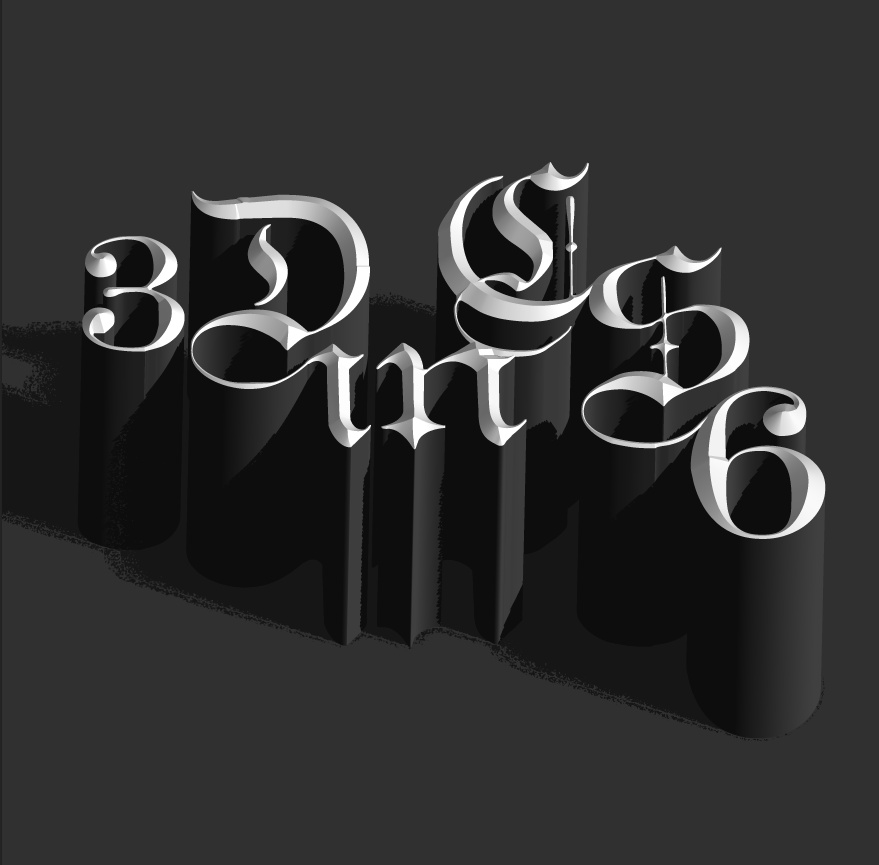
Here is the 3D text you will have after applying the effects. Now it's time to render. Go to
3D>Render.
Step 5
The 3D image will be render and you will get a much sharper result.
The rendering might take a little long, so it's time to get some coffee
:) Once is done duplicate this layer. We will use it in the future to
create a mask.
Step 6
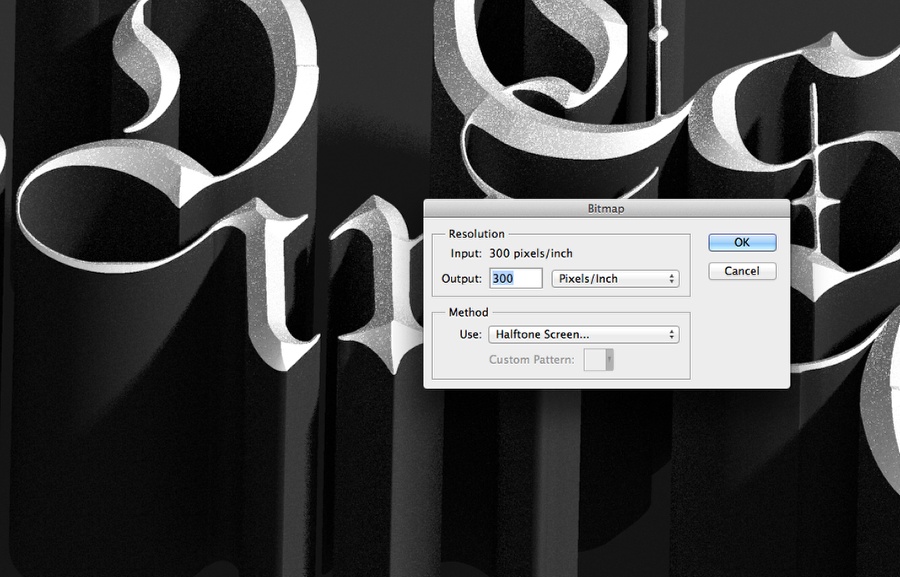
Once the render is over you can rasterize the layer. After that go to
Image>Mode>Greyscale. Then go again to
Image>Mode>Bitmap. Select
300 Pixels/Inch for the output and Halftone Screen for the Method.
Step 7
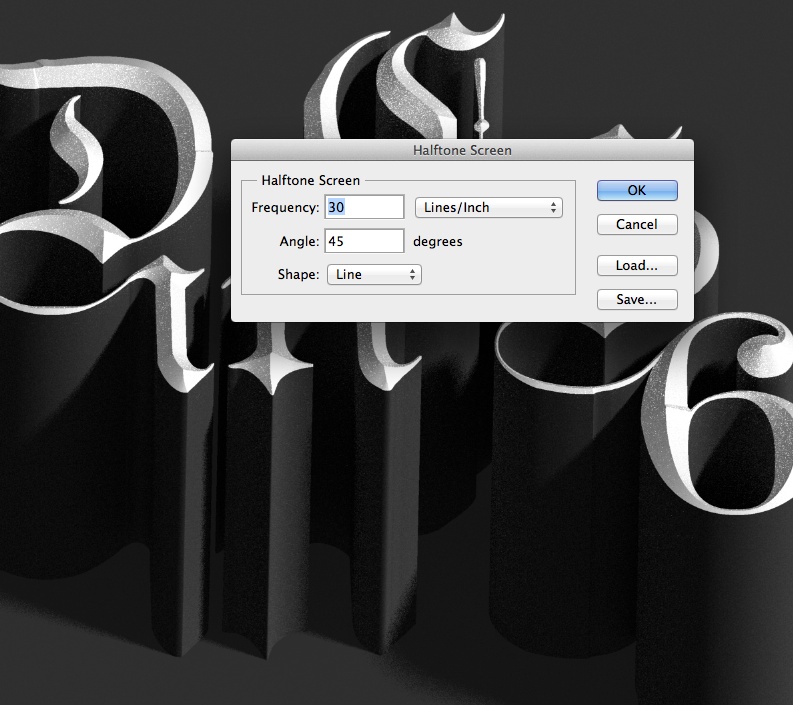
For the
Halftone Screen properties use
30 for the Frequency, 45 for the Angle and LIne for the Shape.
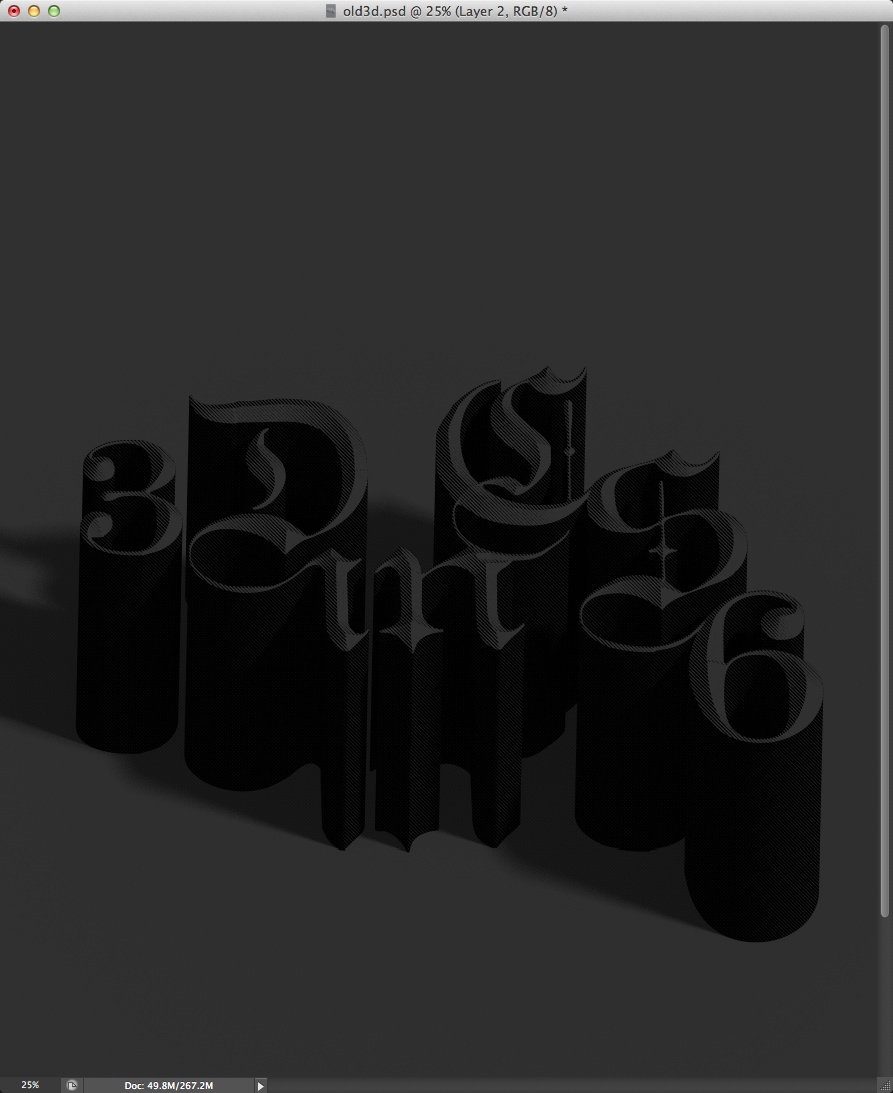
Step 8
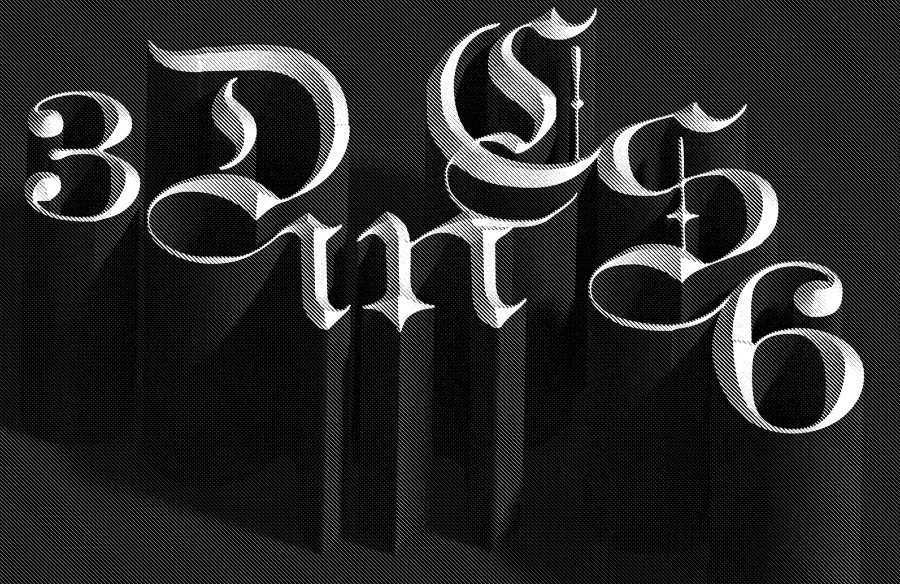
This is the result of the Halftone. Go again to
Image>Mode>RGB Color. Using
the layer duplicated in the Step 5, create a marquee selection by
holding Command and clicking on the thumb of the layer. The idea here is
to hide the background with the halftone. We just need the 3D text and
shadow.
Step 9
Add a new layer and fill it with
#303030 for the color.
Step 10
Move the new layer so it's behind the 3D. Select the 3D layer and change the
Blend Mode to Multiply.
Step 11
Duplicate the layer and change the
Blend Mode to Normal.
Step 12
Go to
Layer>New Adjustment Layer>Photo Filter. Use Deep Blue for the Filter at 50%.
Step 13
Select all layers and duplicate them. After that merge the new layers into one and go to
Filter>Blur>Gaussian Blur. Use 10 pixels for the Radius.
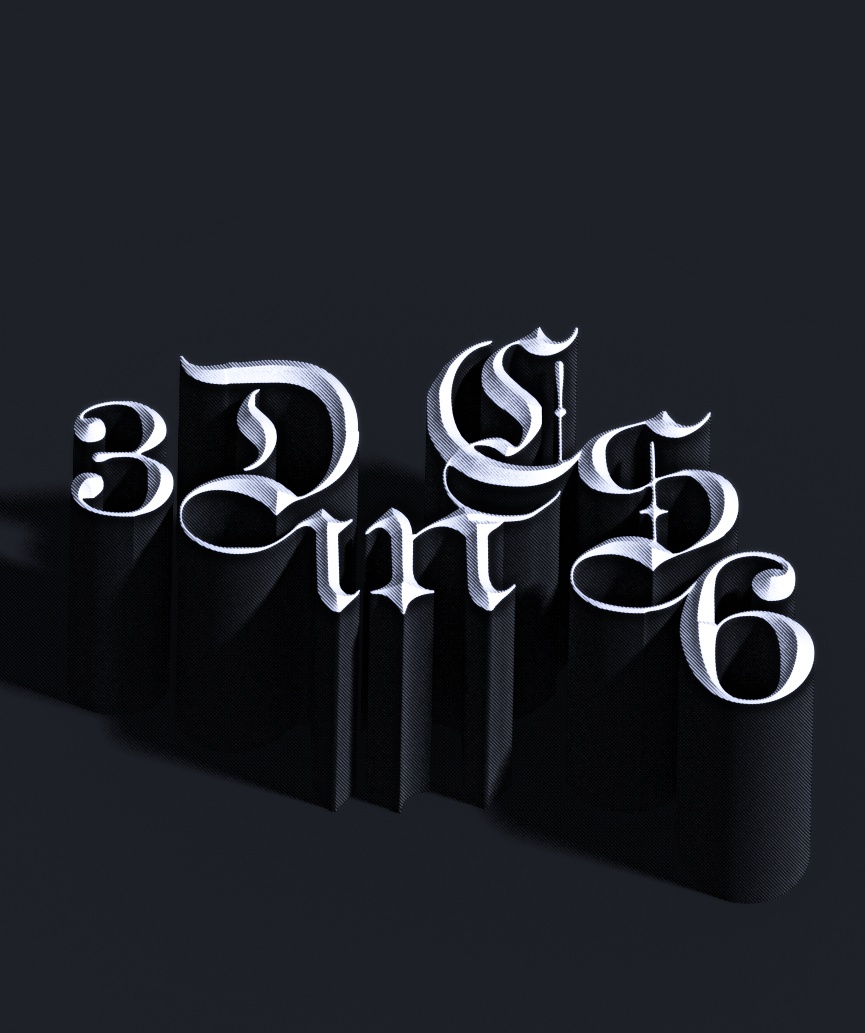
Conclusion
Change the
Blend Mode of the blurry layer to Overlay at 50%
and the design will be done. The idea of this tutorial was to create a
nice 3D effect using the new 3D interface in Photoshop CS6 and we found
out that it has improved quite a lot since the previous version in terms
of speed and ease to use.


YEE
回覆刪除thanks for your sharing as the article is good
回覆刪除https://www.hdcourse.com/seo/how-to-improve-seo/